


INTRODUCTION
In this tutorial we will learn how to create a realistic water reflection effect using the power of Photoshop.
Here you can see the preview of the final result
Step 1
______________________________________________________________________
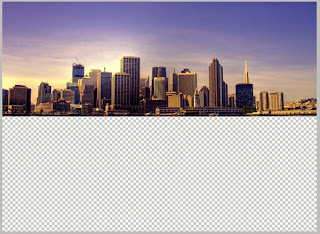
The very first thing you have to do is to open the image you want to modify in Photoshop. Then go to “Image”, click on “Canvas Size” and double the “Height”. Make sure you choose the top as the anchor point.
(Note: You can also use the crop tool and crop the image larger than the canvas size)
Step 2
----------------------------------------
In this step we’ll start creating the reflection. So, duplicate the previous layer (CMD/Ctrl+J) and call it “Reflection”. Then go to “Edit>Transform>flip Horizontal”

Step 3
------------------------------------------------------
Now, we’ll create some blur. Filter>Blur>Motion Blur. Set the angle to 90° and the distance to 30 pixels.
Step 4
-----------------------------------------------------------
Select the “Smudge Tool” and set the size of the brush to 150 pixels, the hardness at 0 and the strength to 20%. Use this tool to create some irregularity typical of a water surface.I suggest you experiment with settings to get the result you like most.

Step 5
-----------------------------------------------------
It’s time to create the water ripples.Now, create a new layer, fill it with White. Go to Filter>Noise>Add Noise.
Amount 400%, set the “distribution” to Gaussian and check “Monocromatic”.

Step 6
------------------------------------------
Go to Filter>Blur>Motion Blur. Set the angle to 0 degrees and the distance to 40 pixels.Now we’ll modify the contrast. So click Ctrl + L and use the following values:
Input Black: 147
Midtones: 1,53
Input White: 219

Step 7
-----------------------------------------
To make the ripples seem more real, we’ll work on the perspective.So, go to “Edit”, “Transform” and click on “Perspective”. Simply go to a bottom corner (left or right) and drag the corner out. Do the same with a top corner but drag it in.
You should get this result.

Step 8
------------------------------------
Go to “Filter”, “Blur” and Gaussian “Blur”: set the Radius to 3 pixels.Now set the layer opacity to 30% and the blend mode to Soft Light.

Step 9
--------------------------------------------
Duplicate the previous layer.Press Ctrl + I (to invert the colors) and set the blend mode of the level to Overlay, the opacity to 25%.
Remember to put these two layers between the layer with the original picture and the one called “Reflection”.
